Salted Caramel Butter Bars Recipe
Introduction
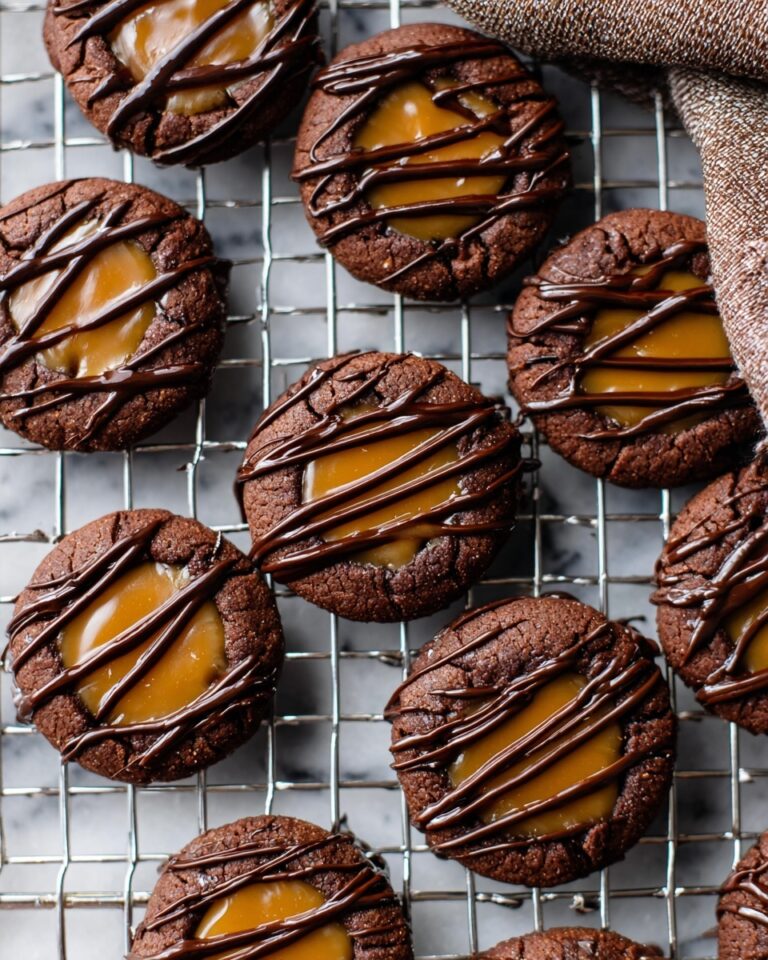
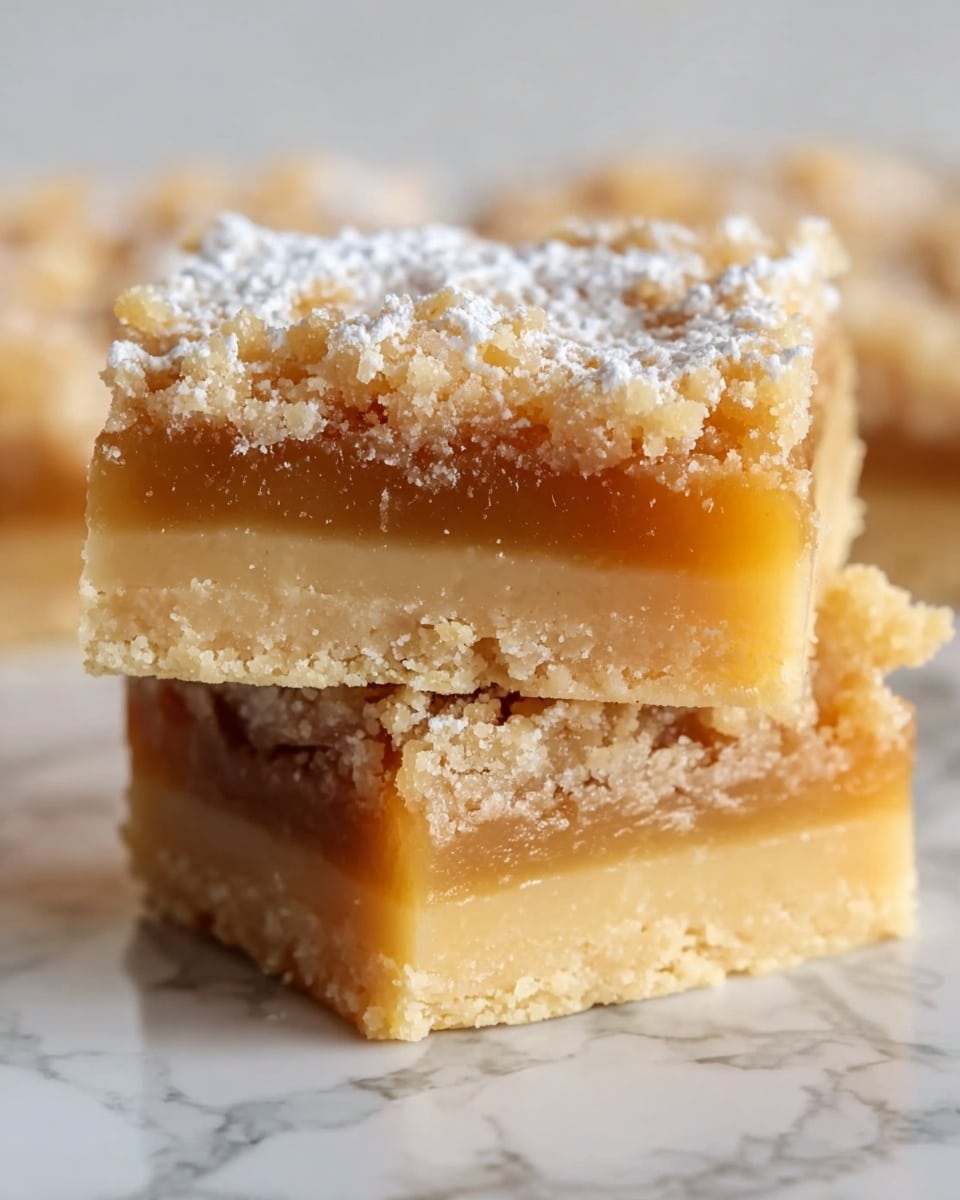
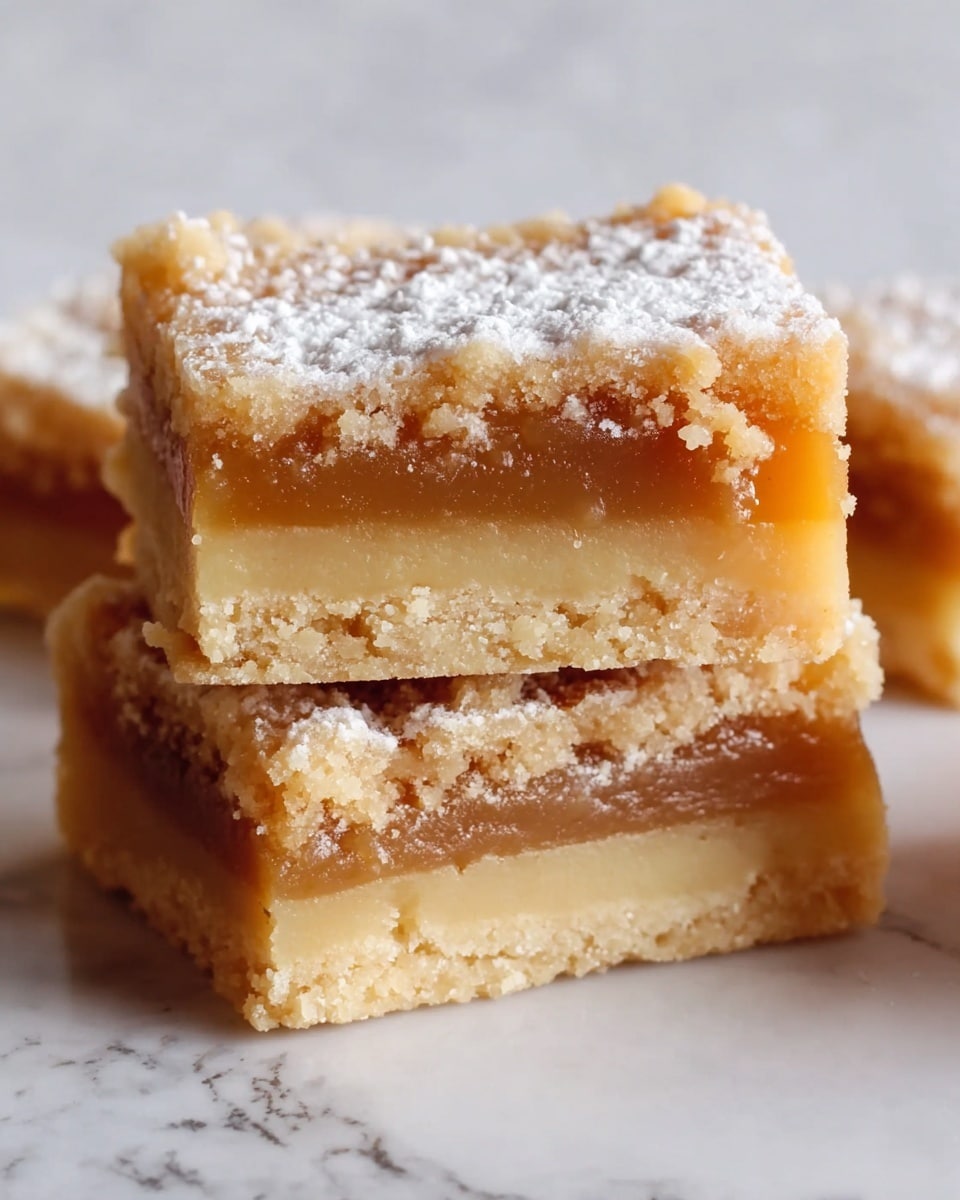
If you’re craving a dessert that’s rich, buttery, and utterly irresistible, these Salted Caramel Butter Bars are the answer. With a tender crust, gooey caramel filling, and a sprinkle of sea salt, they strike the perfect balance of sweet and salty in every bite.
Ingredients
- 1 pound (2 cups) unsalted butter, at room temperature
- 1 cup granulated sugar
- 1½ cups powdered sugar
- 2 tablespoons vanilla extract
- 4 cups all-purpose flour
- 1 (14 oz) bag of caramel candies, unwrapped (or 2 cups soft caramel bits)
- ⅓ cup heavy cream
- ½ to 1 teaspoon coarse sea salt (adjust to taste)
Instructions
- Step 1: Preheat your oven to 325°F (165°C). Line a 9×13-inch baking pan with parchment paper, leaving some overhang on the sides for easy lifting later.
- Step 2: In a large mixing bowl, beat the softened butter, granulated sugar, and powdered sugar until light and fluffy. Add the vanilla and mix to combine. Gradually add the flour, mixing until a thick dough forms.
- Step 3: Press half to two-thirds of the dough evenly into the bottom of your prepared pan. Set the remaining dough aside for the topping. Bake for 20 minutes or until lightly golden.
- Step 4: While the crust is baking, melt the caramel candies and heavy cream together in a microwave-safe bowl or over low heat on the stove. Stir frequently until smooth and fully combined.
- Step 5: Once the bottom layer is done baking, remove it from the oven and pour the warm caramel over the crust. Spread evenly with a spatula. Sprinkle the top with sea salt.
- Step 6: Crumble the remaining dough over the top of the caramel layer. Don’t press it down—just sprinkle it to create a rustic, buttery topping.
- Step 7: Return the pan to the oven and bake for another 25–30 minutes, or until the topping is set and lightly golden.
- Step 8: Let the bars cool completely in the pan before slicing. For cleaner slices, chill in the fridge for 1 hour after cooling. Use the parchment overhang to lift and slice cleanly.
Tips & Variations
- Use room-temperature butter for the creamiest dough and best texture.
- Don’t overbake the base or topping—it should be just lightly golden.
- Stir the caramel constantly while melting to avoid scorching.
- Sprinkle flaky sea salt while caramel is warm so it sticks beautifully.
- Chill before cutting to get clean, bakery-style squares.
- Try drizzling melted chocolate over the top for an added touch of decadence.
- Add chopped pecans or walnuts to the topping for extra crunch.
- Swirl in raspberry jam into the caramel layer for a fruity twist.
- Mix a pinch of cinnamon into the dough for warmth and spice.
Storage
Store the bars in an airtight container at room temperature for up to 3 days, or refrigerate for up to a week. To freeze, wrap bars tightly in plastic wrap, then place in a freezer-safe container or bag for up to 2 months. Thaw at room temperature before serving. Reheat individual bars in the microwave for 10–15 seconds to revive the gooey caramel center.
How to Serve
Serve this delicious recipe with your favorite sides.
FAQs
Can I use store-bought caramel sauce instead of melting caramels?
Yes, you can. Just make sure the caramel sauce is thick and rich, not too runny, to maintain the right texture in the bars.
Are these bars overly sweet?
Though rich and sweet, the coarse sea salt sprinkled on top balances the sweetness perfectly, giving a delightful contrast in flavor.
PrintSalted Caramel Butter Bars Recipe
These Salted Caramel Butter Bars are the perfect combination of buttery, gooey, and sweet with a hint of sea salt. Featuring a tender crust and topping made from rich butter and sugar, filled with smooth, melted caramel layered in between, they’re an irresistible dessert treat that delivers a gourmet taste experience. Easy to make with simple ingredients and basic kitchen tools, they bake to a golden perfection and slice into luscious bars perfect for sharing or gifting.
- Prep Time: 20 minutes
- Cook Time: 50 minutes
- Total Time: 1 hour 10 minutes
- Yield: 24 bars 1x
- Category: Dessert
- Method: Baking
- Cuisine: American
Ingredients
For the Crust and Topping:
- 1 pound (2 cups) unsalted butter, at room temperature
- 1 cup granulated sugar
- 1½ cups powdered sugar
- 2 tablespoons vanilla extract
- 4 cups all-purpose flour
For the Caramel Filling:
- 1 (14 oz) bag of caramel candies, unwrapped (or 2 cups soft caramel bits)
- ⅓ cup heavy cream
- ½ to 1 teaspoon coarse sea salt (adjust to taste)
Instructions
- Prepare the Pan: Preheat your oven to 325°F (165°C). Line a 9×13-inch baking pan with parchment paper, leaving an overhang on the sides to make lifting the bars out easier.
- Make the Dough: In a large mixing bowl, beat the softened butter, granulated sugar, and powdered sugar together until the mixture is light and fluffy. Add the vanilla extract and mix to combine. Gradually add the flour, mixing until a thick dough forms.
- Press and Bake the Bottom Layer: Press half to two-thirds of the dough evenly into the bottom of the prepared pan. Reserve the remaining dough for the topping. Bake this bottom layer for 20 minutes or until it is lightly golden.
- Prepare the Caramel: While the crust is baking, melt the unwrapped caramel candies and heavy cream together in a microwave-safe bowl in short intervals or over low heat on the stove, stirring frequently, until smooth and fully combined.
- Layer the Caramel: After removing the crust from the oven, pour the warm caramel evenly over it. Spread the caramel with a spatula and sprinkle the top with coarse sea salt to balance the sweetness.
- Add the Topping: Crumble the reserved dough over the caramel layer, taking care not to press it down to keep a rustic, buttery texture.
- Bake Again: Return the pan to the oven and bake for another 25–30 minutes or until the topping is set and lightly golden.
- Cool and Slice: Allow the bars to cool completely in the pan. For cleaner slices, chill in the fridge for 1 hour after cooling. Use the parchment paper overhang to lift the bars from the pan and slice them neatly.
Notes
- Use room-temperature butter for the creamiest dough and best texture.
- Avoid overbaking the base and topping; aim for a light golden color.
- Stir the caramel constantly while melting to prevent scorching.
- Sprinkle flaky sea salt when the caramel is warm so it adheres well.
- Chill bars before cutting to achieve clean, bakery-style squares.
- Skip using parchment paper and you may face difficulty removing and slicing the bars.
- Use unsalted butter, not margarine or salted butter to maintain flavor balance.
- Unwrap caramels ahead of time to save preparation time.
- Do not overpack the dough when pressing; press firmly but not too hard to avoid a dense crust.
- Ensure you add sufficient salt to the caramel to balance the sweetness perfectly.
Keywords: salted caramel, butter bars, dessert bars, caramel bars, baked dessert, caramel butter bars, sweet treats, homemade caramel bars